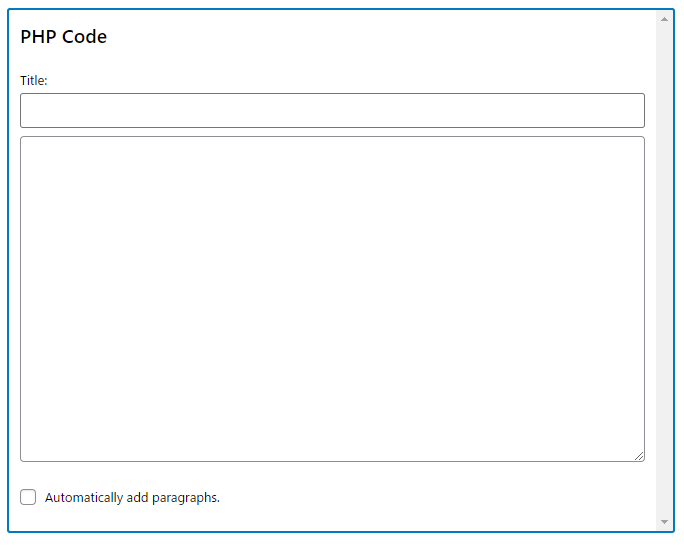
こんにちは、この記事ではWordPressのプラグインを使用せずにPHPが使用可能なウィジェットを追加するための方法をご紹介します。
WordPressのウィジェット機能は、サイトのサイドバーやフッターに簡単に要素を追加するための便利なツールですが、基本的にプラグインを使用しなければウィジェットをカスタマイズすることはできません。
この記事では、PHPが使用可能なカスタムウィジェットを作成する方法を説明します。これにより、汎用性・拡張性・利便性を兼ね備えた万能なウィジェットをサイトのどこにでも配置することができるようになります。
プラグインを使用せずに、PHPの知識だけでウィジェットを作成する方法を学びたい方は、ぜひこの記事を読んでみてください。
WordPressプラグインなしでPHP使用可能なウィジェット追加
ウィジェット実装イメージ

サンプルコードの動作環境
動作検証をおこなったテスト環境は以下の通りです。ブロックウィジェット・クラシックウィジェットの双方で動作確認をしています。
| 項目 | バージョン |
|---|---|
| WordPress | 5.0.0 |
| PHP | 5.6.0 |
| MySQL | 5.6.0 |
サンプルコード
functions.phpに以下のサンプルコードを挿入しご使用ください。
<?php
/**
* PHP_Code_Widget
* @access
* @param
* @return
* @author
* @see
*/

class PHP_Code_Widget extends WP_Widget {
	function __construct() {
		load_plugin_textdomain( 'php-code-widget', false, dirname( plugin_basename( __FILE__ ) ) );
		$widget_ops = array('classname' => 'widget_execphp', 'description' => __('Arbitrary text, HTML, or PHP Code', 'php-code-widget'));
		$control_ops = array('width' => 400, 'height' => 350);
		parent::__construct('execphp', __('PHP Code', 'php-code-widget'), $widget_ops, $control_ops);
	}

	function widget( $args, $instance ) {
		extract($args);
		$title = apply_filters( 'widget_title', empty($instance['title']) ? '' : $instance['title'], $instance );
		$text = apply_filters( 'widget_execphp', $instance['text'], $instance );
		echo $before_widget;
		if ( !empty( $title ) ) { echo $before_title . $title . $after_title; }
			ob_start();
			eval('?>'.$text);
			$text = ob_get_contents();
			ob_end_clean();
			?>
			<div class="execphpwidget"><?php echo $instance['filter'] ? wpautop($text) : $text; ?></div>
		<?php
		echo $after_widget;
	}

	function update( $new_instance, $old_instance ) {
		$instance = $old_instance;
		$instance['title'] = strip_tags($new_instance['title']);
		if ( current_user_can('unfiltered_html') )
			$instance['text'] =  $new_instance['text'];
		else
			$instance['text'] = stripslashes( wp_filter_post_kses( $new_instance['text'] ) );
		$instance['filter'] = isset($new_instance['filter']);
		return $instance;
	}

	function form( $instance ) {
		$instance = wp_parse_args( (array) $instance, array( 'title' => '', 'text' => '' ) );
		$title = strip_tags($instance['title']);
		$text = format_to_edit($instance['text']);
?>
		<p><label for="<?php echo $this->get_field_id('title'); ?>"><?php _e('Title:', 'php-code-widget'); ?></label>
		<input class="widefat" id="<?php echo $this->get_field_id('title'); ?>" name="<?php echo $this->get_field_name('title'); ?>" type="text" value="<?php echo esc_attr($title); ?>" /></p>

		<textarea class="widefat" rows="16" cols="20" id="<?php echo $this->get_field_id('text'); ?>" name="<?php echo $this->get_field_name('text'); ?>"><?php echo $text; ?></textarea>

		<p><input id="<?php echo $this->get_field_id('filter'); ?>" name="<?php echo $this->get_field_name('filter'); ?>" type="checkbox" <?php checked(isset($instance['filter']) ? $instance['filter'] : 0); ?> /> <label for="<?php echo $this->get_field_id('filter'); ?>"><?php _e('Automatically add paragraphs.', 'php-code-widget'); ?></label></p>
<?php
	}
}

add_action('widgets_init', 'php_code_widget_register');
function php_code_widget_register() {
	register_widget('PHP_Code_Widget');
}

?>
まとめ
ウィジェットで自由にPHPが記述できる環境にしておけば、サイト開発の幅がグンと広がります。例えば、カテゴリごとに人気記事を変えたり、記事ごとにバナーを変更したり、細かい導線設定が可能になります。
是非ともサイト開発にお役立てくださいませ。


